cs193p – Lecture #11 – Multithreading and Persistence

Please note, this blog entry is from a previous course. You might want to check out the current one.

Lecture #11 continues with multi threading and provides more insight into Grand Central Dispatch. It shows how to use refresh control, activity indicators and the network activity indicator. … incorporating all of that in Shutterbug …

The second half of the lecture addresses persistence, using archiving, SQLite and/or the file system.

The code of the demo is available at Stanford and on github.

Slides are available on iTunes …..

The lecture is available at iTunes and is named “11. Multithreading and Persistence (February 12, 2013)”.
FacebooktwitterredditpinterestlinkedintumblrmailFacebooktwitterredditpinterestlinkedintumblrmail

cs193p – Assignment #4 Extra Task #2

Please note, this blog entry is from a previous course. You might want to check out the current one.

Make your application work on the iPad as well with appropriate user-interface idioms on that platform. This will require you to have absorbed the lecture immediately after this was assigned. But you’ll be asked to do this next week anyway, so you’ll be ahead of the game if you do it this week (and get a little bit of extra credit for doing it early).

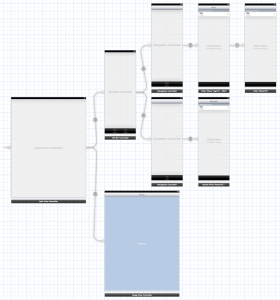
In the iPad storyboard remove the default controller. Drag out a new split-view controller. Remove the default master and detail views. Go to the iPhone storyboard copy every thing and paste it to the Pad storyboard. Set the tab-view controller to be the master view controller. Remove the segues pointing to the image view controller and set the image view as detail view controller:

cs193p - assignment #4 extra task #2
cs193p – assignment #4 extra task #2

Continue reading “cs193p – Assignment #4 Extra Task #2”

FacebooktwitterredditpinterestlinkedintumblrmailFacebooktwitterredditpinterestlinkedintumblrmail

cs193p – Lecture #10 – iPad and Blocks

Please note, this blog entry is from a previous course. You might want to check out the current one.

Lecture #10 introduces tool bars, pop overs and split views (which are demonstrated adjusting Shutterbug for the iPad) and finishes with blocks and multi threading including the new (iOS6) refresh-control feature.

The code of the demo is available at Stanford and on github.

Slides are available on iTunes …..

The lecture is available at iTunes and is named “10. iPad and Blocks (February 7, 2013)”.

FacebooktwitterredditpinterestlinkedintumblrmailFacebooktwitterredditpinterestlinkedintumblrmail

cs193p – Assignment #4 Extra Task #1

Please note, this blog entry is from a previous course. You might want to check out the current one.

Show your lists sorted alphabetically. There are two methods that might be helpful in this: sortedArrayUsingSelector: and sortedArrayUsingDescriptors:. The former is good when you have an array of NSString objects. The latter is good when you have an array of NSDictionary objects (and you want to sort by one of the values in the dictionaries).

… actually use both! The first one to sort the tags:

- (NSString *)tagForRow:(NSUInteger)row
{
    return [[self.photosByTag allKeys] sortedArrayUsingSelector:@selector(compare:)][row];
}

The second one to sort the photos by name:

- (void)setPhotos:(NSArray *)photos
{
    _photos = [photos sortedArrayUsingDescriptors:@[[[NSSortDescriptor alloc] initWithKey:FLICKR_PHOTO_TITLE ascending:YES]]];
    [self.tableView reloadData];
}

The complete code is available on github.

FacebooktwitterredditpinterestlinkedintumblrmailFacebooktwitterredditpinterestlinkedintumblrmail

cs193p – Assignment #4 Task #9 & #10

Please note, this blog entry is from a previous course. You might want to check out the current one.

Since all the lists you display allow further navigation, they should display a disclosure indicator in every cell (Xcode will automatically add this for you when you create a segue from a table view cell).

… if you would like to adjust it yourself you could do so in storyboard using the inspector to set the accessory to disclosure indicator, or set it in code:

cell.accessoryType = UITableViewCellAccessoryDisclosureIndicator;

This application must work properly in both portrait and landscape modes on the iPhone 4 and iPhone 5. It is extra credit to also do the iPad, but the iPhone version is required.

… it does 😉

FacebooktwitterredditpinterestlinkedintumblrmailFacebooktwitterredditpinterestlinkedintumblrmail

cs193p – Assignment #4 Task #8

Please note, this blog entry is from a previous course. You might want to check out the current one.

The recents tab must show a list of the most recently view photos in order, with the most recent at the top and no duplicates in the list. The list of recents must also persist across application termination and relaunch. When a recent photo in the list is chosen, it should navigate to a view of the photo in the same way as other table views in the application do. Limit the size of the list to a reasonable number.

Create a new class derived from NSObject to handle saving and storing the recent photos. Create a public interface to get all photos and to set a new photo:

+ (NSArray *)allPhotos;
+ (void) addPhoto:(NSDictionary *)photo;

Continue reading “cs193p – Assignment #4 Task #8”

FacebooktwitterredditpinterestlinkedintumblrmailFacebooktwitterredditpinterestlinkedintumblrmail

cs193p – Assignment #4 Task #6

Please note, this blog entry is from a previous course. You might want to check out the current one.

When a photo first appears, and as the bounds of the UIScrollView showing a photo change (due to, for example, autorotation), you must adjust the zooming to show as much of the photo as possible with no extra, unused space. Once the user starts pinching to zoom on a given photo, you can stop doing this automatic zooming while that photo continues to be visible.

Like described in lecture #9 viewDidLayoutSubviews is for such occasions the proper place. First calculate which scale would be needed to either show the complete width, or the complete height of the photo. Then pick the higher one because the smaller one would show unused space:

- (void)viewDidLayoutSubviews
{
    [super viewDidLayoutSubviews];
    double wScale = self.scrollView.bounds.size.width / self.imageView.image.size.width;
    double hScale = self.scrollView.bounds.size.height / self.imageView.image.size.height;
    if (wScale > hScale) self.scrollView.zoomScale = wScale;
    else self.scrollView.zoomScale = hScale;
}

The complete code is available on github.

FacebooktwitterredditpinterestlinkedintumblrmailFacebooktwitterredditpinterestlinkedintumblrmail