cs193p – Assignment #1 Extra Task #4

Please note, this blog entry is from a previous course. You might want to check out the current one.

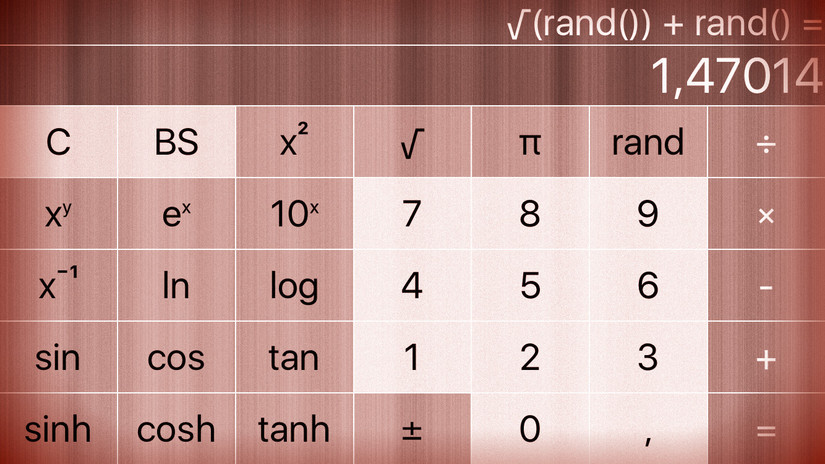
Make one of your operation buttons be “generate a random number between 0 and 1”. This operation button is not a constant (since it changes each time you invoke it). Nor is it a unary operation (since it does not operate on anything).

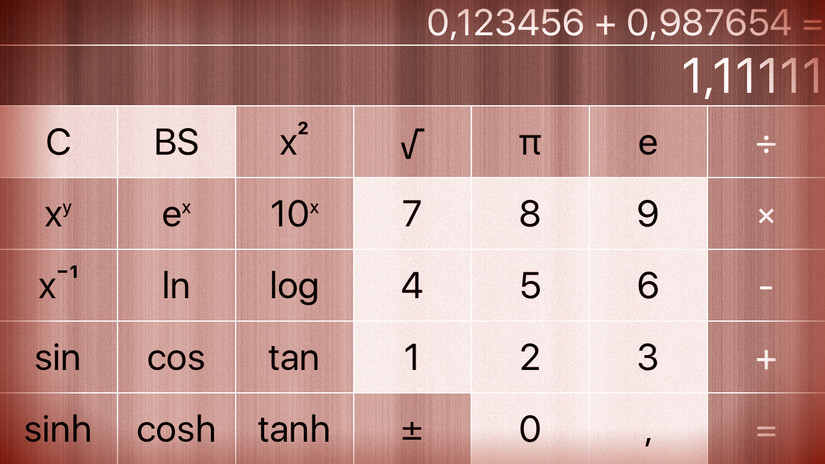
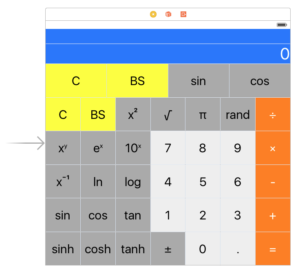
In the interface builder change the name of a button to “rand”:

Storyboard calculator adding random function

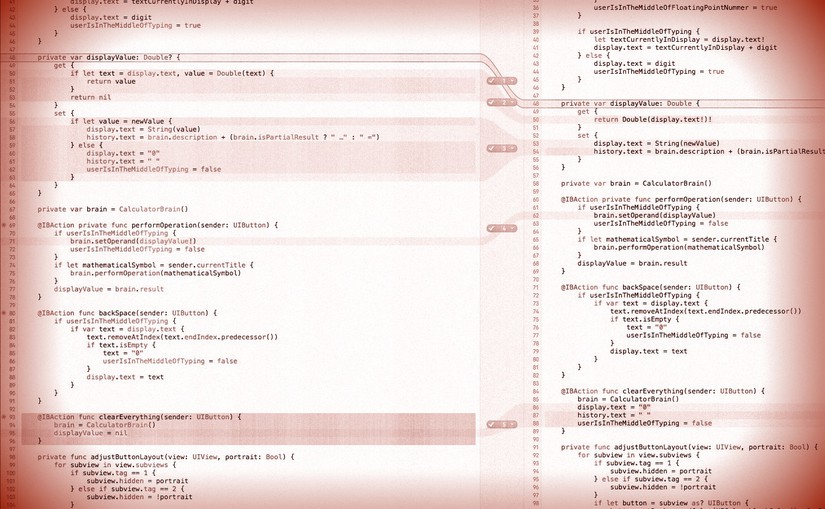
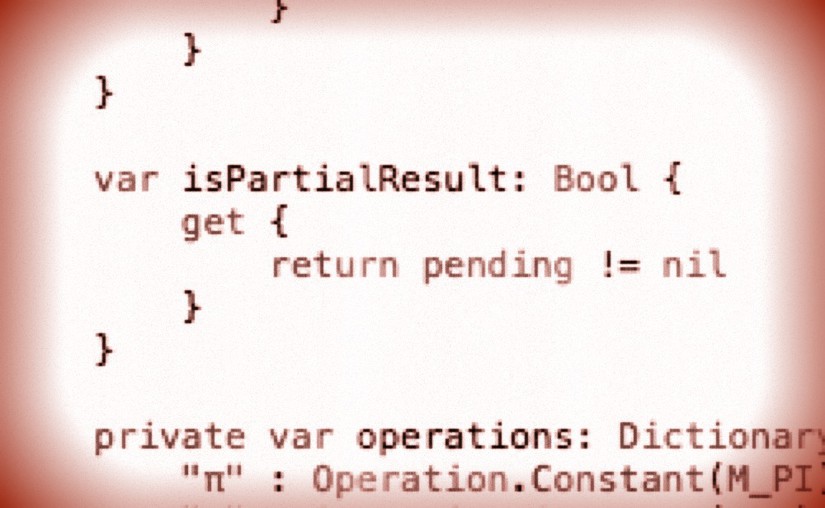
Add an operation without operands to the the calculator model:

private enum Operation {
  ...
  case NullaryOperation(() -> Double, String)
  ...
}

Continue reading “cs193p – Assignment #1 Extra Task #4”

FacebooktwitterredditpinterestlinkedintumblrmailFacebooktwitterredditpinterestlinkedintumblrmail

cs193p – Assignment #1 Extra Task #3

Please note, this blog entry is from a previous course. You might want to check out the current one.

Figure out from the documentation how to use the NSNumberFormatter class to format your display so that it only shows 6 digits after the decimal point (instead of showing all digits that can be represented in a Double). This will eliminate the need for Autoshrink in your display. While you’re at it, make it so that numbers that are integers don’t have an unnecessary “.0” attached to them (e.g. show “4” rather than “4.0” as the result of the square root of sixteen). You can do all this for your description in the CalculatorBrain as well.

NSNumberFormatter uses country-specific number formats. Meaning if your country uses a comma instead of a dot as decimal separator – and your device is set accordingy – the number format will use that specific format. Up to now we only used a dot as decimal separator. We could continue to do that by forcing the number format e.g. by telling it we are always using the US format, or we just deal with it.

Let’s teal with it, starting by changing the the title of the comma button accordingly. First change the tag of it to “3”, than update its title:

private let decimalSeparator = NSNumberFormatter().decimalSeparator!

private func adjustButtonLayout(view: UIView, portrait: Bool) {
      ...
      if button.tag == 3 {
        button.setTitle(decimalSeparator, forState: .Normal)
      }
      ...
}

Continue reading “cs193p – Assignment #1 Extra Task #3”

FacebooktwitterredditpinterestlinkedintumblrmailFacebooktwitterredditpinterestlinkedintumblrmail

cs193p – Assignment #1 Extra Task #2

Please note, this blog entry is from a previous course. You might want to check out the current one.

Change the computed instance variable displayValue to be an Optional Double rather than a Double. Its value should be nil if the contents of display.text cannot be interpreted as a Double. Setting its value to nil should clear the display out. You’ll have to modify the code that uses displayValue accordingly.

If there is no text, or the text cannot be translated to a number, return nil, otherwise the number. If there is a value, set the labels, otherwise reset them:

private var displayValue: Double? {
  get {
    if let text = display.text, value = Double(text) {
      return value
    }
    return nil
  }
  set {
    if let value = newValue {
      display.text = String(value)
      history.text = brain.description + (brain.isPartialResult ? " …" : " =")
    } else {
      display.text = "0"
      history.text = " "
      userIsInTheMiddleOfTyping = false
    }
  }
}

Continue reading “cs193p – Assignment #1 Extra Task #2”

FacebooktwitterredditpinterestlinkedintumblrmailFacebooktwitterredditpinterestlinkedintumblrmail

cs193p – Assignment #1 Extra Task #1

Please note, this blog entry is from a previous course. You might want to check out the current one.

Implement a “backspace” button for the user to touch if they hit the wrong digit button. This is not intended to be “undo,” so if the user hits the wrong operation button, he or she is out of luck! It is up to you to decide how to handle the case where the user backspaces away the entire number they are in the middle of typing, but having the display go completely blank is probably not very user-friendly. You will find the Strings and Characters section of the Swift Reference Guide to be very helpful here.

Add the back-space button (or two) in the interface builder:

Storyboard calculator adding back-space button

Continue reading “cs193p – Assignment #1 Extra Task #1”

FacebooktwitterredditpinterestlinkedintumblrmailFacebooktwitterredditpinterestlinkedintumblrmail

cs193p – Assignment #1 Task #8

Please note, this blog entry is from a previous course. You might want to check out the current one.

Add a C button that clears everything (your display, the new UILabel you added above, etc.). The Calculator should be in the same state as it is at application startup after you touch this new button.

Add a clear button (or two) in the interface builder:

Storyboard calculator adding clear buttons

Link the button(s) to a new action method which resets the calculator model and the two displays:

@IBAction func clearEverything(sender: UIButton) {
  brain = CalculatorBrain()
  display.text = "0"
  history.text = " "
}

The complete code for task #8 is available on GitHub.

FacebooktwitterredditpinterestlinkedintumblrmailFacebooktwitterredditpinterestlinkedintumblrmail

cs193p – Assignment #1 Task #7

Please note, this blog entry is from a previous course. You might want to check out the current one.

Use the two properties above to implement a UILabel in your UI which shows the sequence of operands and operations that led to what is showing in the display. If isPartialResult, put . . . on the end of the UILabel, else put =. If the userIsInTheMiddleOfTypingANumber, you can leave the UILabel showing whatever was there before the user started typing the number. Examples …
a. touching 7 + would show “7 + …” (with 7 still in the display)
b. 7 + 9 would show “7 + …” (9 in the display)
c. 7 + 9 = would show “7 + 9 =” (16 in the display)
d. 7 + 9 = √ would show “√(7 + 9) =” (4 in the display)
e. 7 + 9 √ would show “7 + √(9) …” (3 in the display)
f. 7 + 9 √ = would show “7 + √(9) =“ (10 in the display)
g. 7 + 9 = + 6 + 3 = would show “7 + 9 + 6 + 3 =” (25 in the display)
h. 7 + 9 = √ 6 + 3 = would show “6 + 3 =” (9 in the display)
i. 5 + 6 = 7 3 would show “5 + 6 =” (73 in the display)
j. 7 + = would show “7 + 7 =” (14 in the display)
k. 4 × π = would show “4 × π =“ (12.5663706143592 in the display)
l. 4 + 5 × 3 = would show “4 + 5 × 3 =” (27 in the display)
m. 4 + 5 × 3 = could also show “(4 + 5) × 3 =” if you prefer (27 in the display)

Continue reading “cs193p – Assignment #1 Task #7”

FacebooktwitterredditpinterestlinkedintumblrmailFacebooktwitterredditpinterestlinkedintumblrmail

cs193p – Assignment #1 Task #6

Please note, this blog entry is from a previous course. You might want to check out the current one.

Add a Bool property to your CalculatorBrain called isPartialResult which returns whether there is a binary operation pending (if so, return true, if not, false).

This a a short one, just add a computed property depending on the private pending property:

var isPartialResult: Bool {
  get {
    return pending != nil
  }
}

… and adjust the unit tests:

func testDescription() {  
  // a. touching 7 + would show “7 + ...” (with 7 still in the display)
  ...
  XCTAssertTrue(brain.isPartialResult)
  
  // b. 7 + 9 would show “7 + ...” (9 in the display)
  ...
  XCTAssertTrue(brain.isPartialResult)
  
  // c. 7 + 9 = would show “7 + 9 =” (16 in the display)
  ...
  XCTAssertFalse(brain.isPartialResult)

  // d. 7 + 9 = √ would show “√(7 + 9) =” (4 in the display)
  ...
  XCTAssertFalse(brain.isPartialResult)
  
  // e. 7 + 9 √ would show “7 + √(9) ...” (3 in the display)
  ...
  XCTAssertTrue(brain.isPartialResult)
  
  // f. 7 + 9 √ = would show “7 + √(9) =“ (10 in the display)
  ...
  XCTAssertFalse(brain.isPartialResult)
  
  // g. 7 + 9 = + 6 + 3 = would show “7 + 9 + 6 + 3 =” (25 in the display)
  ...
  XCTAssertFalse(brain.isPartialResult)
  
  // h. 7 + 9 = √ 6 + 3 = would show “6 + 3 =” (9 in the display)
  ...
  XCTAssertFalse(brain.isPartialResult)
  
  // i. 5 + 6 = 7 3 would show “5 + 6 =” (73 in the display)
  ...
  XCTAssertFalse(brain.isPartialResult)
  
  // j. 7 + = would show “7 + 7 =” (14 in the display)
  ...
  XCTAssertFalse(brain.isPartialResult)
  
  // k. 4 × π = would show “4 × π =“ (12.5663706143592 in the display)
  ...
  XCTAssertFalse(brain.isPartialResult)
  
  // m. 4 + 5 × 3 = could also show “(4 + 5) × 3 =” if you prefer (27 in the display)
  ...
  XCTAssertFalse(brain.isPartialResult)
}

The complete code for task #6 is available on GitHub.

FacebooktwitterredditpinterestlinkedintumblrmailFacebooktwitterredditpinterestlinkedintumblrmail