Please note, this blog entry is from a previous course. You might want to check out the current one.
Use the two properties above to implement a UILabel in your UI which shows the sequence of operands and operations that led to what is showing in the display. If isPartialResult, put . . . on the end of the UILabel, else put =. If the userIsInTheMiddleOfTypingANumber, you can leave the UILabel showing whatever was there before the user started typing the number. Examples …
a. touching 7 + would show “7 + …” (with 7 still in the display)
b. 7 + 9 would show “7 + …” (9 in the display)
c. 7 + 9 = would show “7 + 9 =” (16 in the display)
d. 7 + 9 = √ would show “√(7 + 9) =” (4 in the display)
e. 7 + 9 √ would show “7 + √(9) …” (3 in the display)
f. 7 + 9 √ = would show “7 + √(9) =“ (10 in the display)
g. 7 + 9 = + 6 + 3 = would show “7 + 9 + 6 + 3 =” (25 in the display)
h. 7 + 9 = √ 6 + 3 = would show “6 + 3 =” (9 in the display)
i. 5 + 6 = 7 3 would show “5 + 6 =” (73 in the display)
j. 7 + = would show “7 + 7 =” (14 in the display)
k. 4 × π = would show “4 × π =“ (12.5663706143592 in the display)
l. 4 + 5 × 3 = would show “4 + 5 × 3 =” (27 in the display)
m. 4 + 5 × 3 = could also show “(4 + 5) × 3 =” if you prefer (27 in the display)
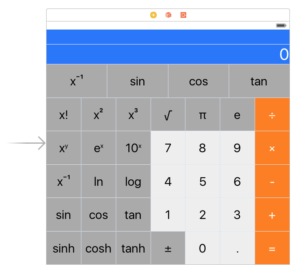
Add the new label in the interface builder:

… and link it to a new outlet property:
@IBOutlet private weak var history: UILabel!
Finally, set the history label together with the display label:
private var displayValue: Double {
  ...
  set {
    display.text = String(newValue)
    history.text = brain.description + (brain.isPartialResult ? " …" : " =")
  }
}
The complete code for task #7 is available on GitHub.

thanks for your effort, it did help me a lot
Thanks! Really helped me understand (albeit after many hours) the assignment. 🙂