Please note, this blog entry is from a previous course. You might want to check out the current one.
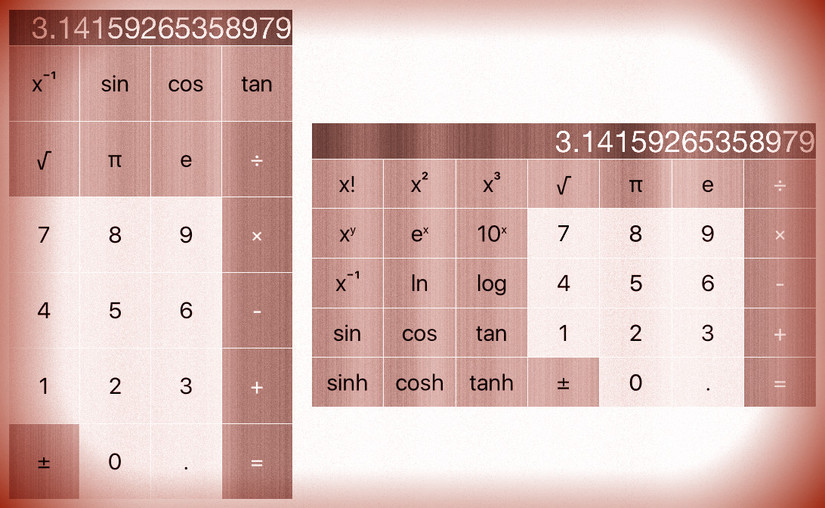
Add some more operations buttons to your calculator such that it has at least a dozen operations total (it can have even more if you like). You can choose whatever operations appeal to you. The buttons must arrange themselves nicely in portrait and landscape modes on all iPhones.
Add the new operations to the calculator model:
private var operations: Dictionary<String,Operation> = [
  ...
  "x²" : Operation.UnaryOperation({ pow($0, 2) }),
  "x³" : Operation.UnaryOperation({ pow($0, 3) }),
  "x⁻¹" : Operation.UnaryOperation({ 1 / $0 }),
  "sin" : Operation.UnaryOperation(sin),
  "cos" : Operation.UnaryOperation(cos),
  "tan" : Operation.UnaryOperation(tan),
  "sinh" : Operation.UnaryOperation(sinh),
  "cosh" : Operation.UnaryOperation(cosh),
  "tanh" : Operation.UnaryOperation(tanh),
  "ln" : Operation.UnaryOperation(log),
  "log" : Operation.UnaryOperation(log10),
  "eˣ" : Operation.UnaryOperation(exp),
  "10ˣ" : Operation.UnaryOperation({ pow(10, $0) }),
  "x!" : Operation.UnaryOperation(factorial),
  "xʸ" : Operation.BinaryOperation(pow),
]
The factorial is not available as “native” function, we need to provide it ourselves. However, note that it really only works for integer values. For non-integers you might want to implement a solution using gamma functions:
func factorial(op1: Double) -> Double {
  if (op1 <= 1) {
    return 1
  }
  return op1 * factorial(op1 - 1.0)
}
The layout part of task #3 is best solved together with task #4:
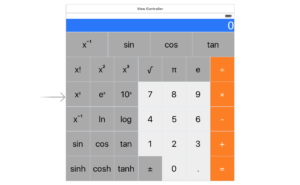
Use color to make your UI look nice. At the very least, your operations buttons must be a different color than your keypad buttons, but otherwise you can use color in whatever way you think looks nice.
Add the new buttons and color them using the inspector of the interface builder:
From the interface builder it is not possible to change e.g. the background color of the buttons when they are pressed – which is also not really required. To do this in code extend the button class, to create an image in the required color and use it for the control state of the button:
extension UIButton {
    func setBackgroundColor(color: UIColor, forState state: UIControlState) {
        let rect = CGRectMake(0.0, 0.0, 1.0, 1.0)
        UIGraphicsBeginImageContextWithOptions(rect.size, false, 0)
        let context = UIGraphicsGetCurrentContext();
        color.setFill()
        CGContextFillRect(context, rect)
        let image = UIGraphicsGetImageFromCurrentImageContext()
        UIGraphicsEndImageContext()
        setBackgroundImage(image, forState: state);
    }
}
When the calculator loads call function to adjust the layout of the main view. Enumerate its sub views. If it is a button, change its background color. If it is a stack view continue with its sub views:
private func adjustButtonLayout(view: UIView) {
  for subview in view.subviews {
    if let button = subview as? UIButton {
      button.setBackgroundColor(UIColor.blackColor(), forState: .Highlighted)
    } else if let stack = subview as? UIStackView {
      adjustButtonLayout(stack);
    }
  }
}

override func viewDidLoad() {
  super.viewDidLoad()
  adjustButtonLayout(view)
}
To adjust the layout for the portrait and landscape modes, it would have been nice if we could have used size classes from the interface builder. Unfortunately stack views seem not able to cope with them.
In the interface builder tag the buttons you want to show only in landscape mode with “1”, tag the ones you want to show only in portrait mode with “2” and leave the other ones untagged (with “0”).
Adjust the layout function to hide and show the buttons accordingly:
private func adjustButtonLayout(view: UIView, portrait: Bool) {
  for subview in view.subviews {
    if subview.tag == 1 {
      subview.hidden = portrait
    } else if subview.tag == 2 {
      subview.hidden = !portrait
    }
    ...
      adjustButtonLayout(stack, portrait: portrait);
    }
  }
}

override func viewDidLoad() {
  ...
  adjustButtonLayout(view, portrait: traitCollection.horizontalSizeClass == .Compact && traitCollection.verticalSizeClass == .Regular)
}
… and call it when the dimensions change:
override func willTransitionToTraitCollection(newCollection: UITraitCollection, withTransitionCoordinator coordinator: UIViewControllerTransitionCoordinator) {
  super.willTransitionToTraitCollection(newCollection, withTransitionCoordinator: coordinator)
  adjustButtonLayout(view, portrait: newCollection.horizontalSizeClass == .Compact && newCollection.verticalSizeClass == .Regular)
}
The complete code for the tasks #3 and #4 is available on GitHub.
Hello!
First of all, thank you for your work!
I am beginner in an IOS programming and a mobile development. I started my way of learning from the Stanford University course IOS 9. I watch lectures and try to do assignments. I need some community of other student where I would have an opportunity to discuss my issues with other students. To be honest, I haven’t managed to find any community of student on the internet. As I understood, there is a special platform for that purpose, called Piazza, but this one is only for people who really study in the Stanford University. Could you recommend my any other platform for that on the internet. Your site is the only thing that I have managed to find at the moment.
My main issue at present moment is I don’t understand how to work with visible part of my calculator. I have many buttons and they don’t fit on the screen in the portrait and landscape modes for the different models of IPhone. How should I think when I project my interface of my future program? What could you advise to read about that question?
Are you going to continue to post resolving for the next assignments?
Dear Alex,
I will continue with the assignments, but earing a living and feeding my family has priority.
There is an old piazza forum or a facebook group https://www.facebook.com/groups/1615813908637508/ … both do not have that much traffic …