Please note, this blog entry is from a previous course. You might want to check out the current one.
Objective-C Compatibility
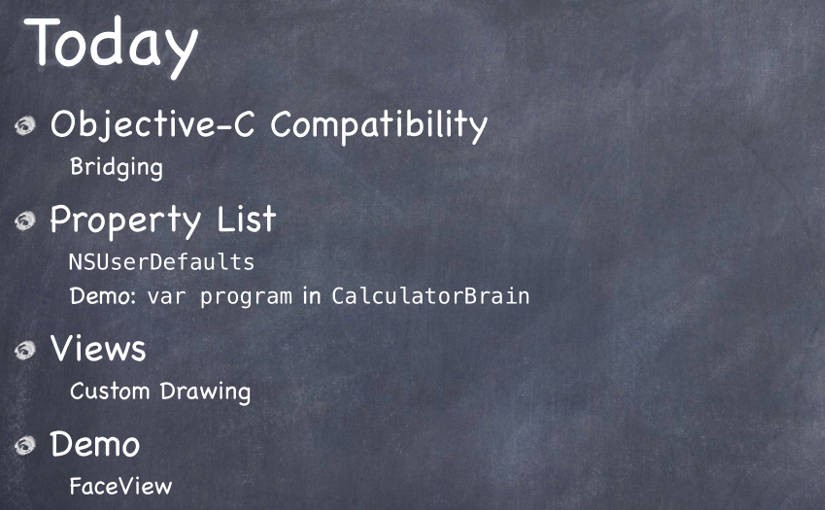
Lecture #5 starts with theory on how Swift was built to be compatible with Objective-C and thus provides numerous seamless bridging methods:
- NSString bridges to String
- NSArray bridges to Array<AnyObject>
- NSDictionary bridges to Dictionary<NSObject, AnyObject>
- Int, Float, Double, Bool bridge to NSNumer – but not the other way around – use instead intValue, floatValue, doubleValue and boolValue
Additionally, it is possible to implicitly cast using as.
Property List
Property lists are collection of AnyObjects.
NSUserDefaults are a way to store property lists persistently between launchings.
Get the defaults:
NSUserDefaults.standardUserDefaults()
Store and retrieve property lists:
setObject(AnyObject, forKey: String)
objectForKey(String) -> AnyObject?
arrayForKey(String) -> Array<AnyObject>?
setDouble(Double, forKey: String)
doubleForKey(String) -> Double
Though changes are saved automatically, it can be forced:
defaults.synchronize()
A short demo shows how to use property lists in the calculator app.
Views
UIViews are rectangular areas with a coordinate system for drawing and handling touch events. They are structured hierachically having a superview and subviews and a UIWindow at the very top.
Views most often are created using story board, but also in code:
addSubview(aView: UIView)
removeFromSuperview()
Thus it has two different initializers which might have to do the exact same setup:
func setup() { ... }
override init(frame: CGRect) {
    super.init(frame: frame)
    setup()
}
required init(coderaDecoder:NSCoder) {
    super.init(coder: aDecoder)
    setup()
}
Additionally awakeFromNib is called when a view is generated via a storyboard.
Views use special data structures to define values, points, sizes and rectangles:
typealias CGPoint = Double
struct CGPoint {
    var x: CGFloat
    var y: CGFloat
}
struct CGSize {
    var width: CGFloat
    var height: CGFloat
}
struct CGRect {
    var origin: CGPoint
    var size: CGSize
}
… with various convenience properties and functions:
var minX: CGFloat
var midY: CGFloat
intersects(CGRect) -> Bool
intersect(CGRect)
contains(CGPoint) ->Bool
The origin of the coordinate system is in the upper left corner. Its units are points with a varying number of pixels (contentScaleFactor) depending on the used device.
frame defines the view in the super view, the view itself is defined by its bounds.
Custom Views
drawRect(regionThatNeedsToBeDrawn: CGRect) is called to draw custom views. To trigger – and indirectly call drawRect:
setNeedsDisplay()
setNeedsDisplayInRect(regionThatNeedsToBeRedrawn: CGRect)
UIBezierPath are used to create shapes, e.g.:
let path = UIBezierPath()
path.moveToPoint(CGPoint(80, 50))
path.addLineToPoint(CGPoint(140, 150))
path.addLineToPoint(CGPoint(10, 150))
path.closePath()
UIColor.greenColor().setFill()
UIColor.redColor().setStroke()
path.linewidth = 3.0
path.fill()
path.stroke()

let roundRect = UIBezierPath(roundedRect: aCGRect, cornerRadius: aCGFloat)
let oval = UIBezierPath(ovalInRect: aCGRect)
… or clip a view using addClip(), or for hit detection:
func containsPoint(CGPoint) -> Bool
Colors are handled using UIColor which even allows transparency using alpha values (don’t forget to set opaque to false).
Setting the hidden property of a view to true removes the view and its sub views completely from the screen.
To draw text use (mutable) attributed strings:
let text = NSAttributedString("hello")
text.drawAtPoint(aCGPoint)
let textSize: CGSize = text.size
… and define the attributes of parts of mutable attributed string using dictionaries and ranges:
func setAttributes(attributes: Dictionary, range: NSRange)
func addAttributes(attributes: Dictionary, range: NSRange)

NSForegroundColorAttributeName : UIColor
NSStrokeWidthAttributeName : CGFloat
NSFontAttributeName : UIFont
Concerning fonts it is best practice to use the ones defined in the user settings:
class func preferredFontForTextStyle(UIFontTextStyle) -> UIFont

UIFontTextStyle.Headline
UIFontTextStyle.Body
UIFontTextStyle.Footnote
… for standard objects like buttons the system fonts:
class func systemFontOfSize(pointSize: CGFloat) -> UIFont class func boldSystemFontOfSize(pointSize: CGFloat) -> UIFont
Images can be drawn form the bundle or image assets, e.g.:
let image: UIImage? = UIImage(named: "foo")
image.drawAtPoint(aCGPoint)
image.drawInRect(aCGRect)
image.drawAsPatternInRect(aCGRect)
… or from file sources, e.g.:
let image: UIImage? = UIImage(contentsOfFile: aString)
let image: UIImage? = UIImage(data: anNSData)
… or you can create them using core graphics (see UIGraphicsBeginImageContext).
UIViewContentMode defines what should happen when the bounds of a view changes. It could just been placed somewhere – .Left/.Right/.Top/.Bottom/.TopRight/.TopLeft/.BottomRight/.BottomLeft/.Center – scaled – .ScaleToFill/.ScaleAspectFill/.ScaleAspectFit – or redrawn – .Redraw.
The demo at the end of the lecture shows parts of the just learned theory.
The lecture and its slides are available via iTunes named “5. Objective-C Compatibility, Property List, Views”. The code for the calculator demo is available on GitHub. The code for the happiness demo is available on GitHub and Stanford.
