cs193p – Assignment #1 Task #5

Please note, this blog entry is from a previous course. You might want to check out the current one.

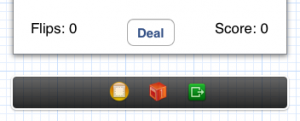
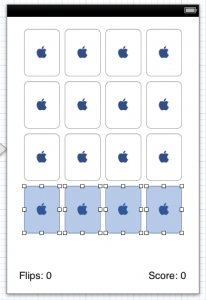
Drag out a switch (UISwitch) or a segmented control (UISegmentedControl) into your View somewhere which controls whether the game matches two cards at a time or three cards at a time (i.e. it sets “2-card-match mode” vs. “3-card-match mode”). Give the user appropriate points depending on how difficult the match is to accomplish.

At the moment (end of lecture #3) the match: method PlayingCard model only supports matches with a single other card. Instead of checking if there is a single card, check if there are other cards (one or more). To adjust the score (3-card matches are more worth then 2-card matches) change the score calculation to add the bonus for each matching card (which might not be accurate concerning the actual odds, …):
Continue reading “cs193p – Assignment #1 Task #5”

FacebooktwitterredditpinterestlinkedintumblrmailFacebooktwitterredditpinterestlinkedintumblrmail

cs193p – Assignment #1 Task #4

Please note, this blog entry is from a previous course. You might want to check out the current one.

Add a button called “Deal” which will re-deal all of the cards (i.e. start a new game). It should reset the score (and anything else in the UI that makes sense). In a real game, we’d probably want to ask the user if he or she is “sure” before aborting the game in process to re-deal, but for this assignment, you can assume the user always knows what he or she is doing when they hit this button.

Create a new button in storyboard:

cs193p - assignment #1 task #4
cs193p – assignment #1 task #4

Continue reading “cs193p – Assignment #1 Task #4”

FacebooktwitterredditpinterestlinkedintumblrmailFacebooktwitterredditpinterestlinkedintumblrmail

cs193p – Assignment #1 Task #3

Please note, this blog entry is from a previous course. You might want to check out the current one.

Add a text label somewhere which desribes the results of the last flip. Examples: “Matched J♥ & J♠ for 4 points” or “6♦ and J♣ don’t match! 2 point penalty!” and simply “Flipped up 8♦” if there is no match or mismatch.

The information needed to display is already inside the model. Analogue to the score create a new property to hold the text string, and set it in flipCardAtIndex:
Continue reading “cs193p – Assignment #1 Task #3”

FacebooktwitterredditpinterestlinkedintumblrmailFacebooktwitterredditpinterestlinkedintumblrmail

cs193p – Assignment #1 Task #2

Please note, this blog entry is from a previous course. You might want to check out the current one.

Add 4 cards to the game (for a total of 16).

Start by selecting one row of cards, copy and place them on your storyboard:

cs193p - assignment #1 task #2
cs193p – assignment #1 task #2

Now connect all four new cards to the outlet connection by control dragging each of them to:

@property (strong, nonatomic) IBOutletCollection(UIButton) NSArray *cardButtons;

The complete code is available on github.

FacebooktwitterredditpinterestlinkedintumblrmailFacebooktwitterredditpinterestlinkedintumblrmail

cs193p – Assignment #1 Task #1

Please note, this blog entry is from a previous course. You might want to check out the current one.

Follow the detailed instructions in the lecture slides (separate document) to reproduce the latest version of Matchismo we built in lecture (i.e. the one with multiple cards) and run it in the iPhone (normal, non-Retina, non-iPhone 5) Simulator. Do not proceed to the next steps unless your card matching game functions as expected and builds without warnings or errors.

… actually done during the lecture. The complete code is available on github.

FacebooktwitterredditpinterestlinkedintumblrmailFacebooktwitterredditpinterestlinkedintumblrmail

iOS Dev – Assignment #1 – Extra Task #2

Visualize the currently active operation by letting the button be pushed until the second operand is entered.

A button can be displayed as pushed by “highlighting”. However, when the resultButtonPressed: method fires, the button is already highlighted and will be dehighlighted shortly after. Thus it is necessary to “wait a little bit” actually till the “normal button functionality” has finished before highlighting the button. This can be achieved by adding an operation on the main queue.
To remove the highlighting, add a property to hold the currently pressed button.

@property (nonatomic, strong) UIButton *currentButton;

- (IBAction)operationButtonPressed:(UIButton *)sender {
	...
	else
	{
		...
		self.currentButton.highlighted = NO;
	}
	...
	[[NSOperationQueue mainQueue] addOperationWithBlock:^{
		sender.highlighted = YES;
		self.currentButton = sender;
	}];
}

- (IBAction)resultButtonPressed:(id)sender {
	...
	self.currentButton.highlighted = NO;
}

- (IBAction)clearDisplay:(id)sender {
	...
	self.currentButton.highlighted = NO;
}
FacebooktwitterredditpinterestlinkedintumblrmailFacebooktwitterredditpinterestlinkedintumblrmail

iOS Dev – Assignment #1 – Extra Task #1

Adapt the number of shown decimals to the actual result that is to be displayed.

Actually NSNumber does that all. Thus we just have to create an NSNumber from the number before we display it. At the same time we change all floats to doubles to reduce the problem of the “float feature” described before:

- (IBAction)operationButtonPressed:(UIButton *)sender {
    ...
    self.numberTextField.text = [NSString stringWithFormat:@"%@", 
         [NSNumber numberWithDouble:firstOperand]];        
    ...
}

- (IBAction)resultButtonPressed:(id)sender {
    ...
    self.numberTextField.text = [NSString stringWithFormat:@"%@", [NSNumber numberWithDouble:result]];
    ...
}
FacebooktwitterredditpinterestlinkedintumblrmailFacebooktwitterredditpinterestlinkedintumblrmail